Best Unicorn Cupcakes
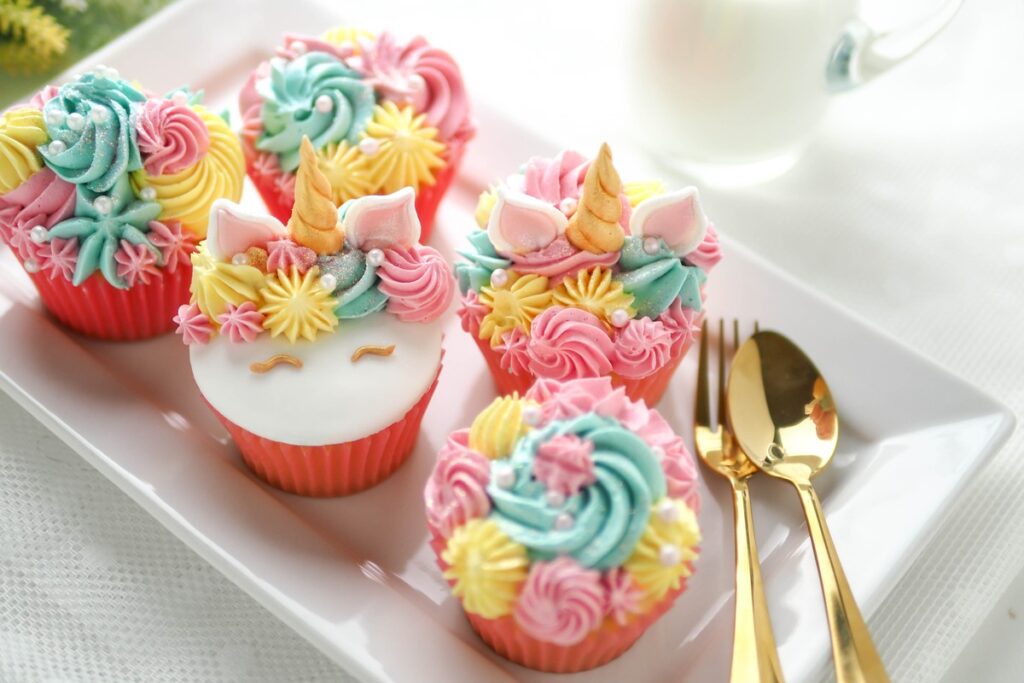
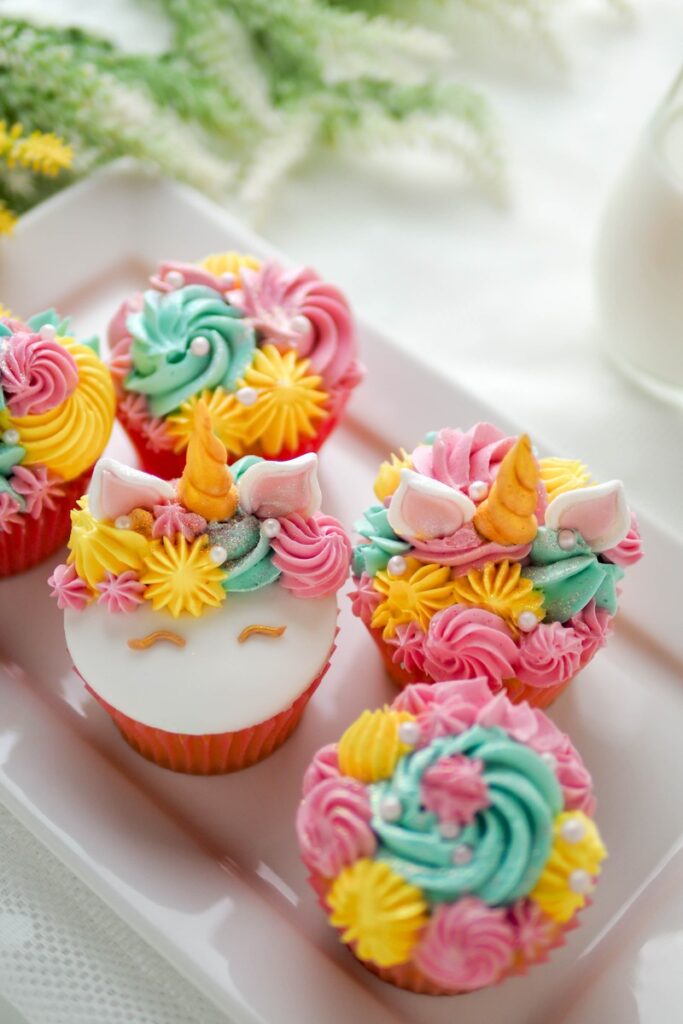
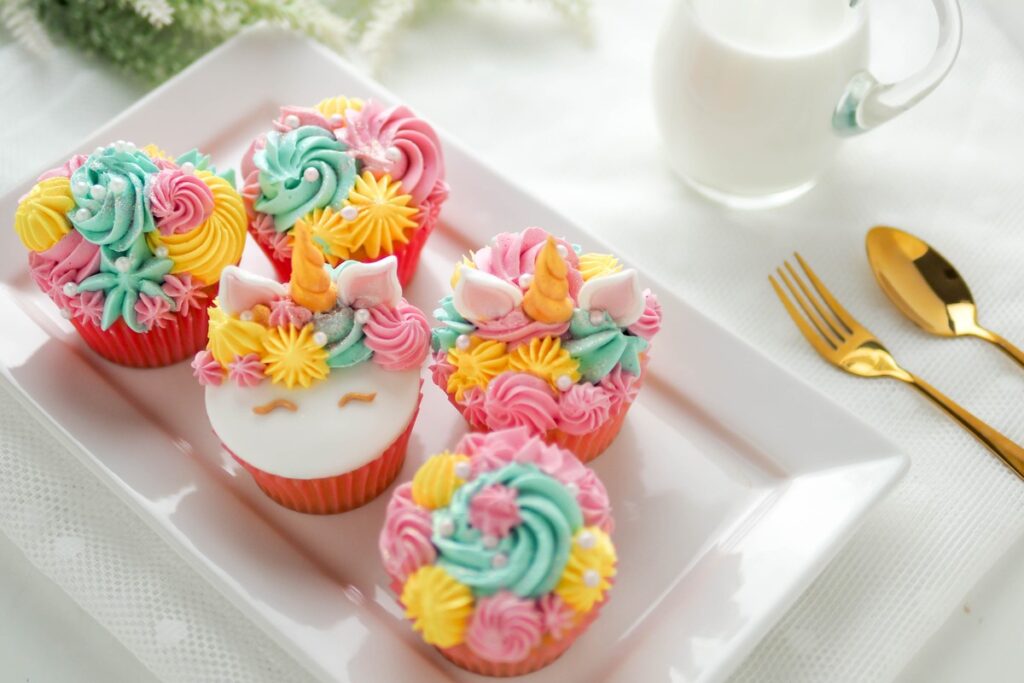
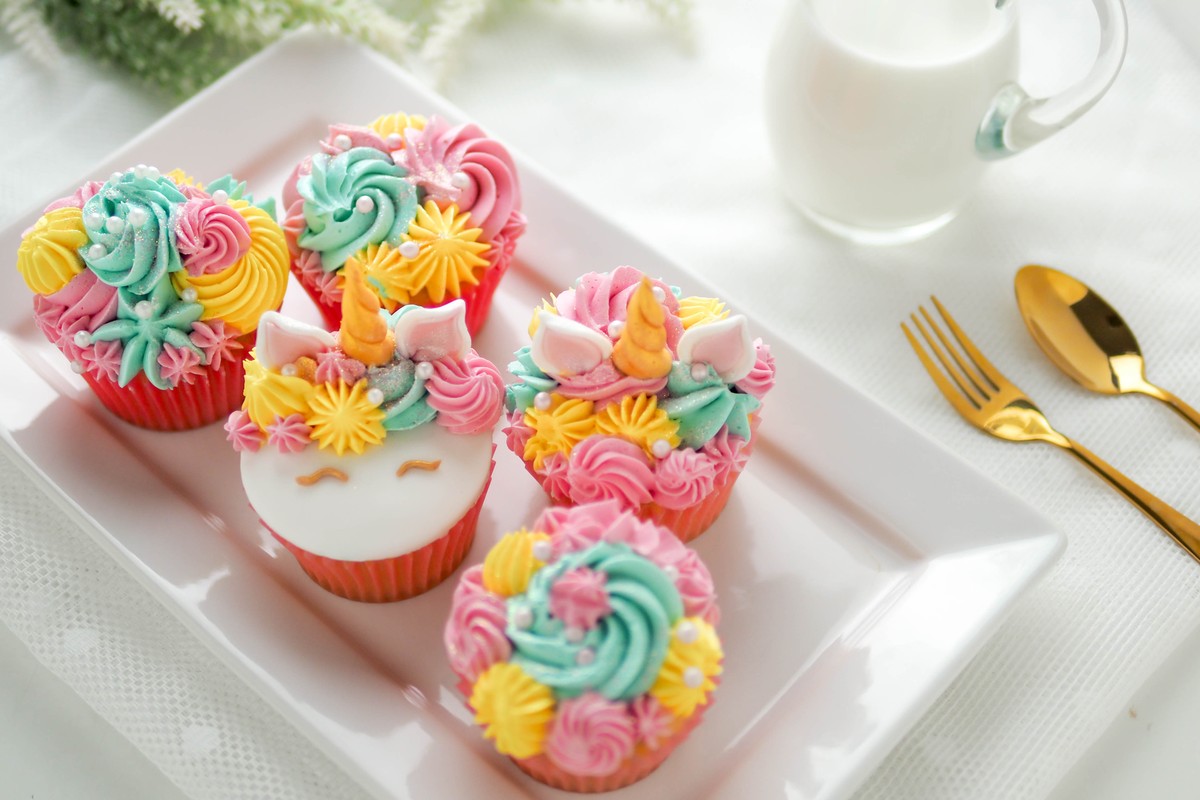
Unicorn cupcakes bring a touch of magic to any gathering, transforming simple baked treats into dazzling desserts. These whimsical cupcakes, adorned with shimmering horns, pastel flowers, and dreamy eyes, make the perfect centerpiece for birthdays, themed parties, or any festive occasion. Whether you’re hosting a fairytale-inspired event or simply surprising someone special, these unicorn cupcakes are a showstopper that exudes charm and creativity. With edible horns, soft marshmallow ears, and a swirl of tri-colored buttercream, this recipe ensures a delightful baking experience with stunning results.

Ingredients You Will Need to Create Unicorn Cupcakes
Every element of these unicorn cupcakes contributes to their magical appeal. Here’s what you’ll need:
Cupcake Essentials
You can use your favorite vanilla cupcake recipe or pre-made cupcakes to form the base. The Unicorn Cupcakes should be sturdy enough to hold the frosting and decorations without sinking.
Unicorn Horns
Mini ice cream cones create the perfect horn shape. Coat them in white melting chocolate to achieve a smooth and glossy appearance. A dusting of silver luster dust adds a shimmering, ethereal finish.
Unicorn Ears
Soft, pillowy marshmallows cut diagonally provide a seamless look for the ears. A gentle brush of pink luster dust gives them a subtle, rosy tint, adding charm to the design.
Buttercream Frosting
Fluffy vanilla buttercream serves as both the cupcake base and the colorful rosettes. You’ll need unsalted butter, powdered sugar, vanilla extract, and heavy cream to achieve the perfect consistency. Gel icing colors pink, purple, and teal help you create the vibrant swirl of pastel blooms.
Decorating Tools
Piping tips, specifically Ateco 809 for the frosting base and Wilton tips 18 and 2 for flowers and eyes, are essential for professional results. Ziplock bags or piping bags are key for creating clean, intricate designs.
Step-by-Step Instructions for Magical Unicorn Cupcakes
Creating these unicorn cupcakes involves several steps, but the results are well worth the effort. Follow this detailed guide for perfectly decorated treats.
Crafting the Unicorn Horns
Start by trimming mini ice cream cones to shorten them slightly, ensuring they look proportionate to the cupcakes. Melt white chocolate in the microwave according to package directions, stirring until smooth. Dip each cone carefully to fully coat it, then stand them upright on a parchment-lined tray to set. For an added whimsical touch, use a toothpick to create a spiral pattern while the chocolate is still soft. Once hardened, brush the cones with silver luster dust to give them a magical, shimmering glow.
Designing the Ears
Slice each mini marshmallow diagonally to form two pointed halves. Trim the sharp edge slightly to create a smooth, uniform shape. Using a clean, food-safe brush, lightly dust the cut center with pink luster dust. The soft blush adds a delicate, realistic detail that pairs beautifully with the horns.
Making the Vanilla Buttercream
To create a creamy, silky buttercream, beat softened butter until it’s light and smooth. Gradually mix in half the powdered sugar, followed by the vanilla extract and 3 tablespoons of heavy cream. Add the remaining powdered sugar and continue beating until fluffy. If the frosting is too thick, add more cream, one tablespoon at a time, to achieve a spreadable consistency.
Piping the Frosting Domes
Attach the Ateco 809 tip to a large piping bag and fill it with buttercream. Hold the piping bag upright, slightly above the cupcake surface, and apply steady pressure. Allow the frosting to spread outward, forming a smooth dome. Gradually lift the bag as you release pressure, creating a clean, rounded finish. Place a chocolate horn in the center and nestle the marshmallow ears symmetrically on either side.
Adding Flowers and Rosettes
Divide the remaining buttercream into three portions, tinting each with gel icing colors to achieve vibrant shades of pink, purple, and teal. Pipe vertical stripes of each color onto plastic wrap, roll it into a log, and transfer the log to a piping bag fitted with the Wilton 18 tip. Gently squeeze the piping bag to create swirled, multi-colored rosettes and flowers along the base of the horn and around the frosting dome. These intricate details enhance the unicorn’s whimsical appearance.
Drawing the Unicorn Eyes
Mix any leftover buttercream with black gel coloring to create a deep, rich shade. Transfer the black frosting to a piping bag fitted with the Wilton 2 tip. Pipe graceful, curved lines just below the horn and flowers to form closed unicorn eyes. Add small “lashes” for a dreamy and expressive finish.

Recipe Tips & Frequently Asked Questions
- How do I keep the frosting smooth and easy to pipe?
- Always use room-temperature butter for the buttercream, and beat it until creamy before adding sugar. If the frosting feels too stiff, add small amounts of heavy cream to soften it.
- How can I prevent the chocolate from dripping off the horns?
- Ensure the melted chocolate isn’t too runny. Let it cool slightly before dipping the cones, and tap off excess chocolate before standing them to dry.
- Can I prepare the horns and ears in advance?
- Yes, both components can be made up to a week ahead. Store them in an airtight container at room temperature to keep them fresh.
- What if I don’t have piping tips?
- Use ziplock bags with a corner snipped off to pipe the frosting and flowers. While the designs may be simpler, they’ll still look charming.
- How do I keep buttercream from melting in warm weather?
- Store the unicorn cupcakes in a cool place and avoid direct sunlight. For outdoor events, consider chilling the cupcakes before serving.
What to Serve With This Unicorn Cupcakes Recipe
Unicorn cupcakes shine as the centerpiece of any dessert spread, but pairing them with complementary treats elevates the overall theme. Add pastel macarons, rainbow-colored cookies, or white chocolate-dipped strawberries for an eye-catching dessert table. Serve the cupcakes alongside whimsical drinks like sparkling pink lemonade, unicorn milkshakes, or colorful layered mocktails to enhance the magical experience. If hosting a themed party, decorate the table with pastel tableware, edible glitter accents, and vibrant florals to tie everything together.

Serving and Storage Guidelines
To keep these unicorn cupcakes fresh, store them in an airtight container at room temperature for up to three days. If you plan to make them ahead, refrigerate the components separately and assemble the cupcakes just before serving. For transport, place the cupcakes in a sturdy container with individual slots to prevent tipping. If freezing is necessary, the undecorated cupcakes can be stored for up to a month; simply thaw and decorate when ready.
Final Presentation and Decorating Inspiration
Arranging these unicorn cupcakes as a focal point adds an enchanting touch to any event. Place them on a tiered dessert stand surrounded by colorful sprinkles, edible glitter, or fairy lights for extra magic. To personalize them, add name tags, themed cupcake wrappers, or edible gold leaf accents. For a creative twist, experiment with rainbow frosting or chocolate cupcake bases to surprise guests with variations of these magical treats.

Unicorn Cupcakes
Ingredients
For the Unicorn Cupcakes
- 12 mini ice cream cones*
- 5 oz white melting chocolate*
- Silver luster dust
- 12 mini marshmallows
- Pink luster dust
- Vanilla Cupcakes
For the Vanilla Buttercream
- 1 ½ cups 345g unsalted butter, softened to room temperature
- 6 cups 690g powdered sugar
- 1 ½ tsp vanilla extract
- 3 –5 tbsp 45–75 ml heavy cream
- Gel icing colors pink, purple, and teal recommended
- Ateco 809 piping tip
- Wilton tip 18
- Wilton tip 2
Instructions
Create the Horns
- Trim the bottom portion of each mini ice cream cone, cutting just above the two main rings to make them shorter and more proportionate. If you’re using Muddy Bites, you can skip this step.
- Melt the white chocolate following the instructions on the package. For convenience, microwave-safe brands like Ghirardelli or Wilton work seamlessly.
- Carefully dip each cone into the melted chocolate, submerging to fully coat the horn. For a whimsical touch, use a toothpick to draw a spiral pattern in the soft chocolate. Stand each horn upright on a parchment-lined baking tray to cool and harden completely.
- Once the chocolate coating has set, brush the horns with silver luster dust using a clean food-safe paintbrush. Store the completed horns in an airtight container until needed they’ll stay fresh for at least a week.
Prepare the Ears
- Take the mini marshmallows and slice each one in half diagonally. Trim off one of the sharper edges for a clean, uniform look.
- Dust the cut center of each marshmallow ear with pink luster dust to give them a soft, rosy hue. Place the finished ears in an airtight container to keep them fresh until assembly day.
Make the Buttercream Frosting
- Beat the softened butter in a large mixing bowl until it turns smooth and creamy.
- Gradually add half of the powdered sugar and mix on medium speed until fully incorporated.
- Pour in the vanilla extract and 3 tablespoons of heavy cream, blending until the mixture is smooth and fluffy.
- Add the remaining powdered sugar and continue to beat until the frosting is silky. Adjust the consistency by adding more heavy cream, one tablespoon at a time, if needed.
Frost the Cupcakes
- Fit a piping bag with the Ateco 809 tip (or a similar large round tip) and fill it with the buttercream frosting.
- Hold the piping bag upright, about half an inch above the cupcake’s surface. Gently apply even pressure to release the frosting, letting it spread outwards into a dome shape. Keep the piping tip steady and partially buried in the buttercream while frosting. Gradually lift the bag as the dome forms, then release pressure and pull away to finish.
- Position the chocolate horn where the piping ends to conceal any imperfections, and add two marshmallow ears symmetrically on either side of the horn.
Design the Buttercream Flowers
- Divide the remaining buttercream into three bowls and tint each batch with gel food coloring pink, purple, and teal are ideal choices. Mix thoroughly to achieve vibrant, even hues.
- Scoop each colored frosting into its own ziplock bag. Pipe thick vertical lines of each color onto a sheet of plastic wrap, aligning them side by side to form stripes. Carefully roll the plastic wrap into a log shape, taking care to avoid blending the colors together. Twist one end of the plastic to seal, then snip the other end.
- Fit a piping bag with the Wilton 18 tip and transfer the buttercream log into it. Pipe delicate rosettes and floral patterns onto the cupcakes, swirling the tri-colored buttercream to create whimsical blooms. Focus on decorating the base of the horn and filling in spaces for a balanced look.
Add the Unicorn Eyes
- Combine any leftover buttercream in a bowl and tint it with black gel coloring until you achieve a deep, consistent shade. Transfer this black frosting to a piping bag fitted with the Wilton 2 tip.
- Pipe closed unicorn eyes just below the horn and flowers, forming graceful curved lines to give your cupcakes a dreamy expression.
Serve and Store
- Serve your whimsical unicorn cupcakes immediately or store them in an airtight container for up to 3–4 days. For longer-lasting freshness or tips on preparing ahead of time, refer to the detailed blog notes.
